It seems local talent is woven into the very fabric of South Orange and Maplewood, NJ. One of the niche connoisseurs we are lucky enough to call a neighbor is Brian Rumbolo: Curator, Gallery Director, and Art Installer.

In fact, IYH Founder, Carla Labianca, has the distinct pleasure of living amid the fruits of Brian’s talents. Carla’s home is overflowing with beautiful, perfectly hung art. And as much as Carla loves a DIY project, she would not have entrusted the installation of her abundant collection which is installed throughout her home to anyone short of an expert.
That said, maybe you are interested in taking on some home-art-hanging yourself. And for this, dear reader, we are shining a Q&A spotlight on Brian and his art-hanging wisdom for you. Enjoy!
Sizing It Up
Lisa Danbrot: What are the rules of thumb in terms of how high to hang, how to center a piece, and how to determine the properly sized piece for a certain sized wall?
Brian Rumbolo The average center height to install art is 57” – 60”, with 60” being the most common. Measure from the floor and place a mark at 60”. This is the center of your framed piece. Determine if the center point works in your space; have one person hold the artwork and another stand back in the room to see how it feels in relation to other objects and doors and windows. Hanging all the art in a room at the same center point gives a nice throughline across the space. Avoid hanging art where the top of the frame is lined up with doorways or window frames as that tends to make a room rather static and draws attention away from the art.
In order to determine the best size artwork for a particular wall, find art that is half to two-thirds the size of the wall in question. For long walls, you don’t need one long piece. You may break up the wall with a triptych or gallery wall. It’s a matter of spatial and color relationships between other objects in the room. Generally, hanging art on the center of a wall is the most common way to create balance and symmetry in a room. This is often the sure way to go. However, sometimes placing a work purposefully off-center can be very interesting and unexpected. This approach tends to be successful with smaller, more intimate types of artwork for example above a nightstand.
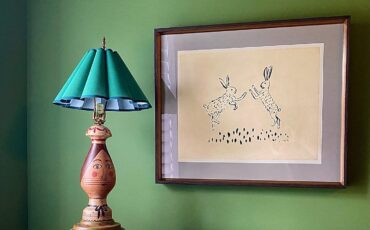
Another opportunity to do off-center placement is when the art becomes part of an arrangement along with other things such as tall plants, statement lamps, sculptural objects, or large vases with branches.


Arranging Art
Lisa: Can you offer some guidance on how to approach/format a salon-style wall? Anything you think lends itself to a successful display?
Brian: For creating a salon-style wall there are many different arrangements that work such as a family photo wall, a thematic approach such as children’s artwork, putting together a collection of disparate but personal pieces, or some combination of these.
Selecting frames is an important component of a successful salon/gallery wall. Using one particular frame style and color gives an orderly and harmonious look. Another approach is to choose a variety of different frame styles and shapes but keep the same color and material. A third approach is to collect vintage frames and to mix them with new frames if the color of the frames is similar. A variety of sizes and shapes work well mixed together.
It’s also quite nice to integrate sculptural elements like vintage wall tiles, ceramic plates, metal signs, or three-dimensional letters or numbers. When possible, space the frames evenly, I find two to four inches in between the frames works well. Interesting locations for a gallery wall can be going up a stairway, down a long hallway, above a couch, or around a television. Another trick that’s very helpful for planning a gallery wall is to trace the shapes of frames onto brown kraft paper and then cut them out. Then tape these shapes onto your wall – this way you can play with placement by moving the paper around until you land on a satisfying arrangement. This is particularly useful on stairways.


The Right Tools
Lisa: What are the best tools for the art-hanging tool case?
Brian: Besides the basics (pencil, measuring tape, and hammer), other useful tools are a level, drill, and blue painter’s tape (great for planning wall layout). There is also a lavender tape manufactured by 3M, which is specifically made for delicate surfaces. I use this tape to draw marks onto for hook placement, instead of marking up a wall. It’s also useful when hanging art on dark-colored walls and wallpaper.
If your frame has a wire or d-rings on the back, you’ll need picture hangers. I prefer brass picture hangers along with thin carbon steel nails. The thinner the nail the more accurate the placement will be. Thin nails are also particularly good for plaster walls found in older homes. The thinner nails tend to penetrate the plaster without chipping it as a thicker nail might.
Frames with keyhole style in the back (typically found on mirrors), use “bear claw” screws. It is important to pre-drill a pilot hole for screws going in plaster walls to prevent the plaster from buckling and cracking. Self-adhesive silicone bumpers are very useful for the back lower corners of frames as they prevent frames from scratching walls and staying in place.
Well, there you have it.
If you don’t want to entrust the hanging of your Gallery Wall, the beloved portrait of your Great, Great Grandmother, or the mounting of the large, heavy mirror replete with ornate gilt frame, to anyone short of an expert, take heart. You may always call on Brian Rumbolo.


